
Using an I2C Real Time Clock (RTC) with a Raspberry Pi
Updated instructions for newer Pi's over here.
Unlike most computers the Raspberry Pi doesn't contain a Real Time Clock (RTC), we assume it was left out of the design to save space and/or money. A RTC is a coin cell battery powered clock which keeps accurate time, even when the computer is powered off. Without one, the Raspberry Pi isn't capable of keeping time by itself.
If you're using a Pi Model B with an Internet connection then you can get the time from the Internet using Network Time Protocol (NTP), however if you're using a Model A or just don't have a network connection, then you'll need an RTC to keep time.
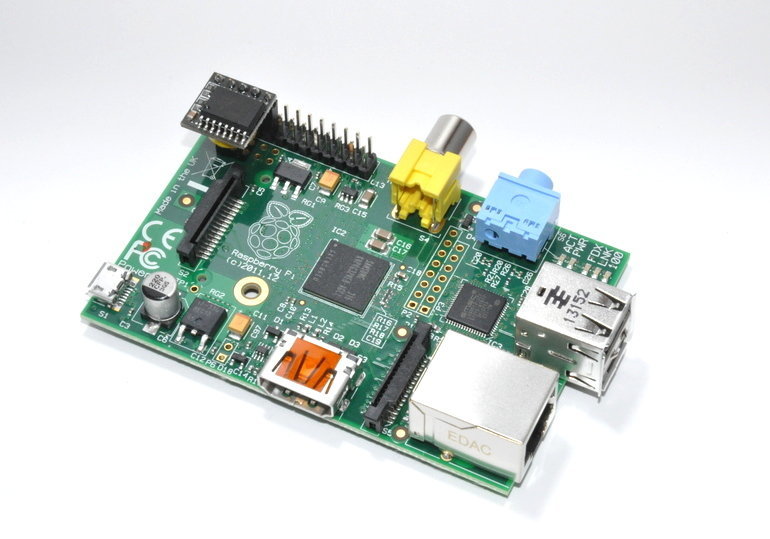
We've found a simple to use RTC module for the Raspberry Pi with the Dallas DS3231 I2C RTC chip which is also a bunch more accurate than the commonly used DS1307 chip. It's also tiny, and fits right on the Pi's GPIO header (seen top left of the image).
Here's the basic steps you need to get the Pi RTC Module going on the latest Raspbian distribution you can download from the Raspberry Pi Foundation's website.
# Remove the module blacklist entry so it can be loaded on boot
sudo sed -i 's/blacklist i2c-bcm2708/#blacklist i2c-bcm2708/' /etc/modprobe.d/raspi-blacklist.conf
# Load the module now
sudo modprobe i2c-bcm2708
# Notify Linux of the Dallas RTC device
echo ds1307 0x68 | sudo tee /sys/class/i2c-adapter/i2c-1/new_device
# Test whether Linux can see our RTC module.
sudo hwclock
That's it! You can also add the i2c initialisation command to rc.local which means it will be run at every boot up;
# Add the RTC device on boot
sudo sed -i 's#^exit 0$#echo ds1307 0x68 > /sys/class/i2c-adapter/i2c-1/new_device#' /etc/rc.local
echo exit 0 | sudo tee -a /etc/rc.local
This doesn't cover automatically setting the clock on boot and but you can do so by adding another line (above exit 0) to rc.local with;
hwclock -s
hwclock --debug -s
Produced the error
/dev/rtc not found - No usable clock interface
i2cdetect -y 0 and ictdetect -y 1 showed nothing but zeros
Although the picture seems clear I wondered if it was a mistake since the first two Pi connectors are power.
With nothing left to lose I moved the board over to the inner set of connectors.
i2cdetect showed a 68 on the grid and the file /dev/rtc0 appeared after booting.
Putting a symbolic link ln -s /dev/rtc /dev/rtc0 allowed the hwclock to find the real time clock and it shows the time.
Can you check all this please and adjust the picture on your web page.
Thanks very much for the comment, I'm sure it will help others. I'm not sure why you had to create a symlink when I didn't.
Cheers,
Hadley
- Dirk Slawinski
For a Rev1 Pi you need to change:
echo ds1307 0x68 | sudo tee /sys/class/i2c-adapter/i2c-1/new_device
to:
echo ds1307 0x68 | sudo tee /sys/class/i2c-adapter/i2c-0/new_device
Hugh
Good point, I had completely forgotten about that!
Cheers,
Hadley
- Dirk
i have a raspberry pi "model b" and a RTC like your.
I can't see if you are using the firsts 5 pin of the top, or the bottom.
If we use this image:
http://www.learnhowtodo.org/wp-content/uploads/2014/01/Raspberry-pi-rev-1-gpio-p...
I have to install my ds3231 on the top (5v,5v,ground,gpio14,gpio15)?
OR
I have to put my ds3231 on the bottom (3v,gpio0,gpio1,gpio4,ground)?
Thank You very much!!!
pd: here they are using the bottom (3v,gpio0,gpio1,gpio4,ground) http://nicegear.co.nz/obj/images/pi-rtc-module-mounting.png
It depends what RTC module you're using. For the one we sell there's an image on the product page showing what pins to install it on.
Hadley
I'm trying to build a simple Network Time Server for a Video security/NAS system that has no computers or Internet Access..
Thanks for any direction!
It will work fine with the Raspberry Pi Model B+ as the processor is exactly the same and the GPIO port is compatible.
Cheers,
Hadley
Following the instructions, I am able to see a time when running sudo hwclock. But the date is Jan 01, 2000. How do I set the time and date on the RTC?
Thanks!!!!
Dave
You can use hwclock, check out the manpage for all the details;
hwclock --set --date="2011-08-14 16:45:05"
Type at the command line;
man hwclock
Regards,
Hadley
echo exit 0 | sudo tee -a /etc/rc.local
it's easier to use:
echo exit 0 >> /etc/rc.local
How can i check it on Raspberry?
Thanks.
The good news is that the RTC time and date got set automatically when I went online and did some browsing. If you're intending to go online, don't set up the RTC - it may just get set automatically.
Check the file /etc/rc.local for any bad commands, that could be the issue.
hads
sudo update-rc.d -f fake-hwclock remove
sudo update-rc.d -f ntp remove
You'll need to be the root user to deal with the device, the commands above should run the things that need to be root with sudo.
Cheers,
Hadley
sudo nano /sys/class/i2c-adapter/i2c-1/new_device
Permission is denied. It's just not as simple as your answer implies.
You don't need to edit it, it's not a file, it's part of the sysfs.
Hadley
Because after reboot I have to start again from:
$ sudo modprobe i2c-bcm2708
Btw, my another Raspberry runs Fedora 18 and kernel doesn't have module rtc-ds1307 anymore. They decided to remove it. So I've made python scripts for reading and setting time to DS3231 through i2c bus. It is really simple (not like in Raspbian of course).
"
This doesn't cover automatically setting the clock on boot and but you can do so by adding another line (above exit 0) to rc.local with;
sudo hwclock -s
"
Once I unexported those, they were available for the i2c driver to use, and it all just worked.
Only downside is now my breadboard breakout cable doesn't fit... so I will move the RTC to the breadboard!
Edit /flash/config.txt:
(Editing via SSH)
mount -o remount,rw /flash
vi or nano /flash/config.txt
Add to end of config.txt:
dtoverlay=i2c-rtc,ds3231
Save changes.
mount -o remount,ro /flash
reboot
Then set the time through usual commands. I use the nptd in the autostart.sh and will use a hwclock command to correct the hwclock.
Source webpages:
https://github.com/raspberrypi/firmware/blob/master/boot/overlays/README
http://wiki.openelec.tv/index.php/Config.txt
Great information, thanks for sharing.
Cheers,
Hadley
/boot/config.txt
is needed:
dtparam=i2c_arm=on
dtoverlay=i2c-rtc,ds3231
http://forums.openmediavault.org/index.php/Thread/8770-RPi-2-RTC-module-from-unr...
You are welcome Peter. : )
Hope we see more Kiwis on the OMV forum. I will try to get Emby working on the RPi 2 in the nexts weeks. Have to try and build requisite libraries 1st.
`sudo raspi-config` to enable I2C.
If not taken care of by raspi-config, need to uncomment the
dtparam=i2c_arm=on line in /boot/config.txt and add another line with
dtparam=i2c1=on
The blacklist edit is no more.
Need to add a line to modprobe 'i2c-dev' in
/etc/modules, along with i2c-bcm2708.
Then reboot.
Install 'sudo apt-get install i2c-tools python-smbus',
then check with 'i2cdetect -l' and 'i2cdetect -y 1' to
check that the device is found at 0x68.
While connected to the internet let NTP run for a while, then
check with "ntpq -p". Then set the hwclock's time from NTP-
controlled system time with 'hwclock -w'.
I found the 'hwclock -s' in /etc/rc.local left the system clock
about 5 seconds in the past, maybe the device is still waking up
at that point.
Adding another "(sleep 15; hwclock -s) &" line in rc.local makes
things better by running it again once it has had enough time to
catch its breath.
In the end I did not put "service fake-hwclock stop" before the
"hwclock -s" in rc.local as I think that only does anything at
system shutdown, to record the last known time. So it does not
interfere and maybe even helps for the critical time between when
the filesystem mounts and when rc.local starts the hwclock later
in the boot process.
Test system vs. hardware clock time with "date; hwclock; date"
After a day's testing it seems that fake-hwclock does indeed interfere with the real hwclock if left active. An old (bad) system time seems to be written to the real hwclock at system shutdown.
Either "service fake-hwclock stop" needs to be in /etc/rc.local before the call to "hwclock -s" or else the service disabled for the default runlevel with update-rc.d as suggested in post #28 above.
With all of the comments in this blog, has the original post been updated to reflect all of the recommendations that have been known to work and the different models, as needed?
All of these little mentions posted above should be added to the original procedures and fellas like me won't be circling the wagons for days before I'm successful. Just a thought.
John
Great script
Mike
https://gist.github.com/grubernd/aed721614b36aaa31fd97ef5ab1ec6be
when I run hwclock I get this...
hwclock: Cannot access the Hardware Clock via any known method.
hwclock: Use the --debug option to see the details of our search for an access method.
The clock doesn't get detected. I tried your instructions. No luck. I can post the script and replies if that would help. I have two clocks and neither one works. Any help would be greatly appreciated. Thanks in advance, Vendel/ K2DSI.