
Milking Cows with Arduino - Part 1
I'm going to break this up into a couple of shorter posts, starting with a general introduction here. Please feel free to let me know in the comments if there is anything specific you would like me to cover.
Over the past couple of years I've been working with some local farmers building an automated calf feeder (that's a topic for another post). Over the winter one of the farmers involved in that project came to me asking if I could tackle another project, this time in his milking shed with grown up cows.
While his cowshed (a rotary with 54 milking bales/stalls) is only a few years old, the electronics in it were failing, and unfortunately the company who installed it were offering no support. A replacement system from one of the traditional dairy companies was going to run up to $50,000 or more, and the one he had his eye on wasn't ready to install for this season (marketing departments are often ahead of R&D).
The electronics in question are relatively simple, each milking bale has a few inputs - buttons and switches - and a few outputs - air solenoids for switching vacuum on and off. Sounds like something perfect for an Arduino to do, but remember as there's one for each bale anything we do we're going to need to do 54 times over.
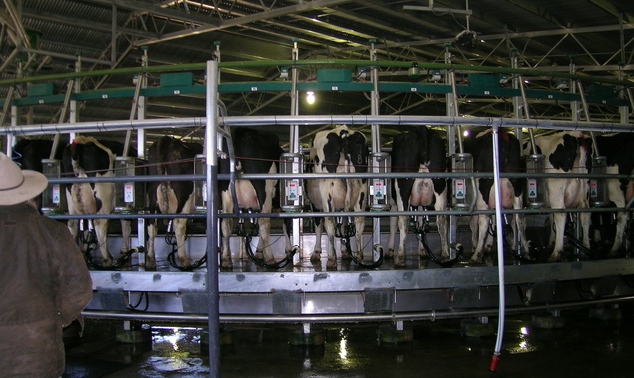
Photo: Cgoodwin Wikipedia
The proposal he came to me with was to see whether we could come up with something low cost to use in the interim, to get him through a few seasons until he decides what he would like to do about a commercial solution. The kicker was that we only had a couple of months over winter to design and implement the solution, it needed to be ready for July when cows start to calve and need to be milked. No milk on a dairy farm is a big problem.
Some specifics about the electronics: There are 4 main digital inputs and outputs - easy for an Arduino to do, but the shed's electronics all run at 24 volts so dedicated drivers need to be switched from the Arduino logic for the outputs.
The four inputs are; 1) A button which starts and stops the milking process for each stall. 2) A switch which detects when the user lifts the cups and automatically starts the milking process. 3) A milk flow meter so we can tell when the cow has finished being milked. and 4) A voltage input to tell us that the plant is being washed. 1 and 2 are basic inputs, 3 and 4 come from an external voltage source so need to be isolated from the Arduino.
The four outputs are air solenoids switching vacuum pressure. One controls the main vacuum for taking the milk from the cows udder back to the tank, two control the pulsators which actually milk the cow, and the final one controls an air ram which removes the cups once the cow is finished milking.
I looked for a while at off the shelf solutions, there are loads of Arduino Shields around these days and even some which offer similar functionality to what I needed, but nothing quite fitted perfectly. In the end I decided to go down the route of creating a custom shield - a big step considering it's not something I had done before. I enlisted the help of hairy.geek.nz, who I knew had experience designing PCBs as we sell one of his products. This worked out great and he was really helpful throughout the project.
That's all for this instalment, next time I'll go into the board and electronics and putting things together.
I've never done a post about the calf feeders as yet unfortunately. In a nut shell each feeder includes an Arduino with Ethernet and communicates over MQTT to a central Linux server which makes all the decisions.
Cheers,
hads
Can you please tell me, what kind of milk flow meter you have used?
peter.bannister88 ( at) gmail.com
Cheers
Peter